Monthly Archives: November 2010

Lazy Susan Cookies

I have a confession, I didn’t own a cookie cutter up until two weeks ago.

But good things come to those who wait and I found myself a treasure. I am now the proud owner of a 1950’s retro Lazy Susan cookie cutter. That’s right, Lazy Susan, as in, 6 rolling moulds. I walked in to a bakery in Tuscaloosa and it had this great little random consignment store attached to it. I saw it (with the box) and had to have it, it’s as simple as that.

Oh and the box just also happened to have a basic recipes for cookies with multiple variations. According to the box, I can now make fancy cookies everyday!

This is that box.

This is that recipe.

And this is that cutter in action.

And these are the finished product.

Can you tell I’m excited about this?

For the record, I used the basic recipe, but played around with it a bit, as you’ll see below. I subbed in the brown sugar instead of the granulated sugar and tossed in 4 squares of chocolate with the shortening mixture. I got the color and the taste I was looking for just by tweaking the basic recipe a bit.

If you’re a fan of a crunchy, perfect for dipping-into-milk cookie, this is for you. I found them to be too hard, but warming them up in the microwave for 15 seconds was how I enjoyed them. The middle got warm and soft, but the outside remained crunchy.

Lazy Susan Cookie Recipe

  • 4 cups sifted cake flour
  • 2 1/2 teaspoons baking powder
  • 1/2 teaspoon salt
  • 2/3 cup shortening
  • 1 1/2 cups granulated sugar
  • 2 eggs, unbeaten
  • 1 teaspoon vanilla
  • 4 teaspoons milk (ok, this is where it gets a somewhat sketchy. The box is slightly torn and I’m pretty sure I’m seeing a “4”. Although, the dough was a little on the dry side, so I added 2 extra teaspoons, but you normally have to play a bit here and there)

Directions

  1. Sift flour, baking powder, salt together.
  2. Cream shortening, sugar until creamy: add eggs, vanilla: beat well.
  3. Add flour alternately with milk: mix well.
  4. Chill dough 1/2 hour.
  5. Roll out to 1/3″ thickness on lightly floured board.
  6. Roll cooky (not a typo, they use the word cooky) roller over dough in continuous movement.
  7. Place on Wear-Ever cooky sheet 1/2″ apart: bake 8-9 minutes in hot oven 400F. (8-9 minutes was too long, the ones I took out after 5-6 minutes came out perfect)
  8. Yield: 6 dozen

Variations

Butterscotch-Pecan: Substitute 2 cups tight packed brown sugar for granulated sugar. Add 1 cup chopped pecans with flour mixture

Chocolate: Add 4 squares melted chocolate to shortening mixture.

Lemon: Substitute 4 teaspoons lemon juice for milk, 2 tablespoons grated lemon rind for vanilla.

Coconut: Add 1 cup finely chopped, shredded coconut with flour mixture.

18 Comments

Filed under Cookies

Homemade Ketchup

I like Heinz ketchup, it’s really what I (we) all know ketchup to be. However, I’ve heard that store-bought ketchup tastes nothing like homemade ketchup, so I wanted to put it to the test. I recalled Jamie Oliver making homemade ketchup and figured that would be a good place to start. I used his recipe as a foundation, I removed certain things (if I couldn’t find them) and added some other ingredients because I realized that ketchup is ketchup when it has tomatoes. Everything else that goes into it is up for interpretation and preference.

So how did it turn out? Well, for starter’s it doesn’t taste like Heinz! It was very good, but definitely different from what we’re accustomed to. Although, I didn’t get that famous red color, the taste of tomato is prevalent, although, mine was slightly overwhelmed with the taste and scent of vinegar. Once I balanced it out with some more brown sugar, it was perfect. Even though I put it through the sieve twice, I did not get that silky, smooth feel of store-bought ketchup which was disappointing. On the positive side, I’ve had the homemade ketchup with meatloaf, burgers, grilled cheese and it’s passed the test!

The end result is that i’ll make it again and tinker with it along the way, but it’s tough not loving the ketchup I’ve grown up with.

By the way, the recipe did not call for mustard powder, I just thought it would be fun and ironic to toss mustard powder into a ketchup. Maybe it’s just me who found that amusing.

Homemade Ketchup – Adapted from Jamie at Home

Makes about 1 litre

Ingredients

  • 1 large red onion, peeled and roughly chopped
  • ½ a bulb of fennel, trimmed and roughly chopped
  • 1 stick of celery, trimmed and roughly chopped
  • olive oil
  • a thumb-sized piece of fresh ginger, peeled and roughly chopped
  • 2 cloves of garlic, peeled and sliced
  • 1 jalapeno, de-seeded and finely chopped
  • a bunch of fresh basil, leaves picked, stalks chopped
  • 1 tablespoon mustard powder
  • 1 teaspoon freshly ground black pepper
  • sea salt
  • 1.5 litres of canned whole tomatoes
  • 200 ml chardonnay vinegar
  • 70 g soft brown sugar

Directions

  • With olive oil, toss the onion, fennel, celery, ginger, garlic, jalapeno, basil stalks and mustard powder in a large saucepan with salt and pepper.
  • Stirring often, let it cook on low heat for 10-15 minutes until the vegetables are soft.
  • Add the tomatoes and 350 ml of cold water. Bring it to a boil and simmer gently until it reduces in half.
  • Add the basil leaves and then blend the sauce. I used my trusty Magic Bullet for the job, but a food processor (or hand blender) would be easier.
  • Push the sauce through a sieve twice to begin making it smooth and shiny.
  • Put the sauce back into a clean pan and add the vinegar and sugar.
  • Simmer the sauce until it reduces and gets to the consistency of ketchup.
  • Season to taste.

I planned on using it all rather quickly for a variety of things, but you can also follow Jamie’s directions for storage.

Spoon the ketchup through a sterilized funnel into sterilized bottles (see page 324 for ways of doing this), then seal tightly and place in a cool dark place or the fridge until needed – it should keep for six months.

18 Comments

Filed under Heinz

Roll Tide in Tuscaloosa!

The state of Alabama may not have the heat of Florida, but it certainly provides warmth to the soul. I was in Tuscaloosa to watch the Alabama Crimson Tide dismantle the Georgia State Panthers. But along the way, I had the opportunity to enjoy some of that down-home southern hospitality you only get to read about.

First stop, food at a wonderful place called the Cypress Inn. Needless to say, I was ready to experience southern cooking in the next 72 hours. Unfortunately, the apps were gone so quickly, pictures weren’t possible, so what you don’t see are an incredible array of award-winning fried catfish (great seasoning, light batter and moist), fried green tomatoes (amazing), fried crab claws (with a little seafood sauce, just perfect), huge jumbo shrimp (the oxymoron at its finest) and get ready for this…fried pickles, so good! By the way, do you see a pattern here?

I ordered shrimp and grits with a side of mustard greens and hoppin’ jons (black-eyes peas and rice).  I’m just going to say it was great and let you have a look for yourself. (Who else is reminded of My Cousin Vinny when they hear of grits?)

Ok, so get this. After this enormous lunch, we were off to do some tailgating before the football game. Tailgating, as in more food! I decided to take a walk to work off some of my lunch, what do I find? Yep, it’s a deep-fried Twinkie. I had to try one, right? Well, it was heavenly, the batter was light and crispy and the inside was still warm. If you’re curious what I thought about it, I finished it off in three bites.


In Tuscaloosa, the game in town is college football. Need proof? Well, the population of Bryant-Denny Stadium is 101,821, yet the population of Tuscaloosa is roughly 93,000 and yet that stadium is constantly packed!

Alabama maimed the poor team from Georgia State 63-7. I’ll take a lopsided win rather than a loss anytime, Roll Tide!

The customary “Where’s Waldo?” picture.

More walking was needed the next day if I was to continue eating all this incredible fried food. So a visit to the Bryant Museum was in order. Coach “Bear” Bryant is legendary across Alabama and college football. If you need further proof, he has a stadium, museum and street named after him in Tuscaloosa. He coached the Alabama football team for 25 years and needless to say left quite an imprint with his black and white Houndstooth fedora, 300+ victories and committment to excellence that still exists today.

Before lunch (yes, more eating), a little walk around campus was in order. The students living here had a good time last night if the cans are any indication.

It was a beautiful day in Tuscaloosa, so we hit up a place called Wintzell’s Oyster House in the neighboring town of Northport. If you’re known for oysters, than, I’m having oysters, but not before some fried green tomatoes and gator tail (yep, it’s fried!) So, what does gator taste like? I hate to say it, but it sort of tastes like chicken, but a little chewier. It doesn’t have much of a taste on its own, but the Cajun seasoning was perfect with it.

As for the oysters, so good. Here we go, from left to right. Grilled oysters, butter, parmesan and romano cheese. They shrink considerably from the heat and turn into little nuggets of flavour. Next, can never go wrong with the famous oysters Rockefeller with spinach and a sprinkling of cheese. Next was my favorite, the Oysters Bienville which consisted of shrimp, crabmeat and parmesan sauce. It was over-the-top decadent with an oyster hiding underneath. Last were Oysters Monterey with jalapeno, bacon and cheddar cheese. Enough said!

After lunch, we did a little walking around Northport. It’s a charming little town, where else do you find a spot to take fun pics like an old barn and a nickel & dime store?

And before we had to leave Tuscaloosa, we HAD to eat again. Unfortunately, the picture didn’t come out well but it was so good, I had to share it. We had dinner at Chuck’s Fish and I had to order what got me the most things on my plate which was the seafood platter. Jumbo lump crab cake, stuffed shrimp wrapped with bacon, blackened Mahi and a cheese grit cake that is Iron Chef worthy.

That is my Tuscaloosa, Alabama experience in a whirlwind 72 hours. Certain places are what they are because of the people and from what I experienced, the people of  Tuscaloosa make the town what it is. As soon as I stepped off the plane, I was treated like a member of the family and for that I have only one thing to say “Thanks y’all & Roll Tide!”

9 Comments

Filed under Alabama, Fried foods, Tuscaloosa

Nutella and Peanut Butter Filled Banana Vanilla Buttermilk French Toast

I’m not a morning person. I’m grumpy and groggy and my brain usually takes a while to become somewhat functional. Today was different, I had a little pep in my step because I had a dream last night in the form of Nutella and peanut butter filled banana vanilla buttermilk french toast. I dreamt of it being filled so I could get the peanut butter, banana and Nutella all together at once. It’s two pieces turned into one amazing super piece of French Toast. I could see it all happening in my dream, the ingredients, me pouring maple syrup over it, me eating it, me enjoying it, me blogging about it.

Weird thing to dream, huh? Well, not if your Twitter stream was full of Nutella references last night. The Nutella fiends that are culpable are Lora from the Cake Duchess and Sara from CaffeIna. They tweet about a multitude of wonderful things, but Nutella was definitely on the menu last night. So with that, I thank you both, because I had a great breakfast consisting of warm bananas, gooey Nutella and peanut butter with bread soaked in egg with a hint of vanilla.

P.S. I’m still not a morning person.

Nutella and Peanut Butter Filled Banana Vanilla Buttermilk French Toast

Ingredients

  • 2 pieces of bread (I used whole wheat, but whatever you have works)
  • 1 egg
  • 1/2 cup of buttermilk (I just happened to have buttermilk because I want to try making biscuits)
  • 1/2 teaspoon of vanilla
  • 1/2 banana
  • Peanut Butter
  • Nutella
  • Butter

Directions – I realize most people know how to make French Toast, but thanks for humoring me by reading this.

  1. Combine egg, buttermilk and vanilla in a bowl.
  2. Spread peanut butter one piece of bread and spread Nutella on the other piece of bread.
  3. Slice the banana and lay flat on the peanut butter side (by the way – it does not matter what side you lay the bananas on).
  4. Make a sandwich by placing the other piece of bread on top of the bananas.
  5. Give it a good push, making sure the bananas are getting a good hug from both the peanut butter and Nutella.
  6. Place it in the egg mixture and make sure both sides and all the edges are covered.
  7. Add the butter to a pan and turn to medium-high.
  8. Once the pan is hot, lay it down and let it cook.
  9. I had to cheat a bit by sneaking a peek to know when to flip it, but when it’s got a crisp to it, it’s time.
  10. Flip it and cook the other side.
  11. Cut it in half or not and enjoy!
  12. Happy Nutella dreams to you tonight.


16 Comments

Filed under Butter, Buttermilk, French Toast

Best Meat Loaf (Meatloaf)

Treasures are meant to be shared and I consider my grandmother’s very own cookbook a treasure. So, that means I’ll be sharing it. It’s a collection of her own type-written recipes, newspaper clippings (the earliest recipe I can see in it dates from 1957) and little notes amongst her and her friends about who liked what dish and where it was served. If the splatters and stains are any indication, it has withstood the test of time. Needless to say, it has seen a lot of kitchen counter-space action over the years.

I’ve known about this cookbook for quite some time, but only recently did it surface from mounds of boxes. It comes at a good time as I’d like to think i’m entering the formative years in my culinary journey.  I’ve recently realized that I need to start learning with the basics and if my grandmother isn’t around, I can at least have her guide me through her cookbook.

I tackled her Sweet and Sour Meat Balls recently and they turned out so well, that I decided I needed to go even more old school and make my very first meat loaf. It’s a dish I love, but haven’t had in years, which had me even more excited to make it. I’ve always thought meatloaf was one word, not two, but who am I to argue with my grandmother?

I’m proud to say I have made meat loaf successfully. It had a great texture between the meat, veggies and bread. The bread pre-soaked in milk definitely allows the flavor of the meat to easily seep in while it’s cooking. And I’m a fan of a crispy top and letting it bake uncovered allows that to happen.

Oh and by the way, nothing goes better with meat loaf than ketchup, so I attempted to make my own homemade ketchup as well…stay tuned!

Best Meat Loaf (If she’s going to call it the “best”, who am I to argue?)

As you can see, I left the recipe intact, I just tried to make it a little easier to follow.

Ingredients

  • 1 pound ground beef (or 2 pounds of beef) – I used all beef
  • 1 pound ground veal (and none of veal)
  • 1/2 cup of chopped onion
  • 1/2 cup of diced celery and tops
  • 1/4 teaspoon of pepper
  • 1 teaspoon of dry mustard
  • 2 beaten eggs
  • 1 tablespoon Worcestershire sauce
  • 4 slices of soft bread, cubed
  • 1 cup of warm milk
  • 1/2 cup of boiling water

Directions

  1. Pre-heat over to 350 F.
  2. Soak bread cubes in warm milk.
  3. Add onions, celery, seasonings to the beaten eggs and combine with the meats and mix thoroughly.
  4. Add bread cubes to meat mixture.
  5. Form into loaf pan and place on a shallow baking dish and pour hot water around the loaf pan.
  6. Dent top with wooden spoon. (Still not sure what that means)
  7. Bake uncovered for 350 F for 60 minutes.

9 Comments

Filed under Meat loaf, Meatloaf

Mother’s Sweet and Sour Meat Balls

Is there a dish that reminds of you of a specific person? When it comes to my grandmother’s, there are many dishes that remind me of them. But that shouldn’t be too surprising, since Jewish grandmother’s (well, all grandmother’s) have a way with food.

Today’s memory is Sweet and Sour Meat Balls and it’s coming directly from my grandmother’s recipe book. She refers to “meatballs” as “meat balls”, so I too will refer to them as meat balls. Hannah as we called her (she thought grandma aged her) could very well be described as the original Paula Dean, minus the accent, but with the same love of butter.


There’s just something about these meat balls, they are soft, moist and full of flavor and yet the sweet sauce that it’s cooked in is possibly even better than the meat balls itself. It’s been about 15 years since I’ve had them, but when I tried one from the batch I made the taste was unmistakable. It was glorious and I was immediately brought back to a unfortuntely period of my childhood that involved a bowl cut, tapered jeans and one of those shocking hypercolor t-shirts. For a simpler review of the meat balls, I had my dad taste them, he just nodded, smiled and said “that’s exactly what it’s supposed to taste like”.

The recipe has stood the test of time, whether it’s 1960, 1985 or 2010, the only difference is that I had to interpret a few things since Hannah used a typewriter (yes typed!) her recipes and some specifics are missing since she could probably do this with her eyes closed. My interpretations are in italics.


Mother’s (or in my case Grandmother’s) Sweet and Sour Meat Balls

Ingredients

  • 1 lb hamburger steak
  • 2 eggs
  • 1 large onion
  • 1 large carrot
  • 1/4 cup rice
  • 1 tbsp. chicken fat (I looked around but couldn’t find any and didn’t have any in the fridge. I used oil, if anything, the chicken fat it makes the meat balls more amazing)
  • 4 tbsp. brown sugar
  • 1 can tomato juice (What size can? I had no idea. I used a cup of tomato juice)
  • 1 can tomato sauce (Again, what size can? I went with a 540 ml can)
  • 1/2 tsp. salt
  • 1/4 tsp. pepper

Directions

  1. Add eggs to meat and mix.
  2. Add rice, salt, and pepper and mix.
  3. Dice onion and brown lightly in chicken fat. (I used vegetable oil)
  4. Make meat balls and fry lightly till brown both sides. (I laughed, “both sides of a ball”, well, I did the top and bottom sides of the ball)
  5. Place grated onion and carrot in bottom of pot. (So the onion isn’t diced, it was sliced and it didn’t say what to do with the carrot, so I just sliced it very thinly)
  6. Place meat balls on top and add hot water to cover.
  7. Let boil 30 minutes or put in over at 350 F. (I went the stove option. I covered the pot and boiled for 30 minutes)
  8. Warm tomato juice, tomato sauce and brown sugar and bring to a boil
  9. Add juices and sugar to meat balls, bring to a boil and then simmer 2 hours or bake in over 3 hours. (I simmered the 1st hour with the lid on and took off the lid for the 2nd hour. If the sauce is still thin, leave the lid off and let it simmer away on low-medium heat. Stir occasionally, but let it tighten up until the sauce is nice and thick, like the picture above.)

11 Comments

Filed under Homemade, Meat Balls, Meatballs, Recipes, Sweet and Sour

Cookie – Chewy vs Crunchy

Today we’re debating the “Cookie”. There are usually two opinions on this ongoing debate.

The question is…soft and chewy OR hard and crunchy?

I’m firmly entrenched in the soft and chewy camp (although, I rarely have ever said no to any type of cookie). I like how a soft cookie begins to fall apart even before it reaches my mouth, I don’t want to work hard at chewing it. If I want something crunchy and crispy, I’ll go grab some crackers.

So with that said, I was intrigued by a recipe I found in Giada’s Kitchen since she called it a biscotti, but in cookie form. She also wrote that it was buttery (presumably because of the butter) and more moist than a typical biscotti. Oh and did I mention, it also involved Nutella. So with all that said, I got to work.

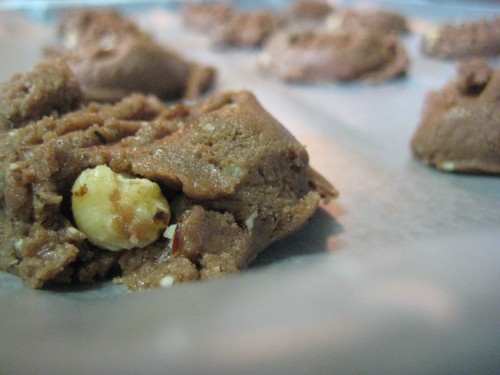
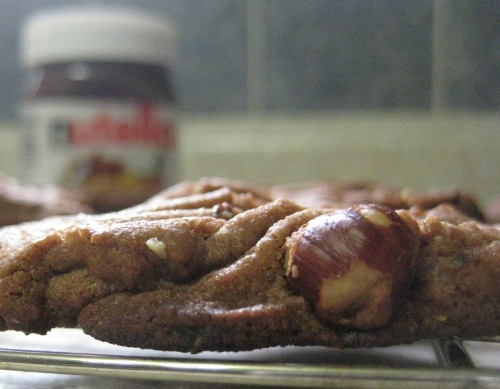
Good news for the hard and crunchy people, the biscotti cookie still gives you the crunch and crumble that you love and will totally withstand a deep dunk in some cold milk. The toasted hazelnuts add to the taste and as usual, the Nutella is present and chocolatey good.

As for me and the other soft and chewy people, it is definitely not as hard and dry as a typical biscotti, which is great news! I would totally make these again, I think they’d go perfect as a light dessert with a cup of tea. But as for any-time-of-day snacking cookies, the search is on for an uber soft and chewy cookie.

Chocolate Hazelnut Biscotti

Recipe from Giada De Laurentiis – Makes 36 (I got 24, my tablespoons were probably a little big)

  • 1 1/3 cups of all-purpose flour
  • 1/2 teaspoon of baking powder
  • 1/2 teaspoon of baking soda
  • 1/4 teaspoon kosher salt
  • 1/2 cup (1 stick) of unsalted butter, at room temperature
  • 1/2 cup of chocolate hazelnut spread such as Nutella (If it says Nutella, I use Nutella)
  • 1/2 cup of granulated sugar
  • 1/2 cup of light brown sugar
  • 1 egg
  • 3/4 cup of chopped toasted skinless hazelnuts (I didn’t bother removing the skins)

Preheat the oven to 375F. Line a cookie sheet with parchment paper.

In a medium bowl, combine the flour, baking powder, baking soda, and salt. Set aside.

In another medium bowl, using an electric mixer, cream the butter, chocolate hazelnut spread, and both sugar together, about 4 minutes. Add the egg and vanilla and beat until smooth, about 1 minute. Using a wooden spoon or rubber spatula, stir in the flour mixture until just combined. Add the hazelnuts and stir until just combined.

Using a tablespoon measure, drop spoonfuls of the cookie dough onto the cookie sheet, spacing the mounds about 4 inches apart. Use the tines of a fork to flatten each mound. Bake 10 to 12 minutes. Use a metal spatula to transfer the cookies to a wire rack and let cool.

Note – To toast the hazelnuts, spread them on a baking sheet and place in a 350F oven for 8 to 10 minutes, or until golden and fragrant. (I used my Magic Bullet to “chop’ them. I wanted to create hazelnut dust and hazelnut crumbs, as well as leaving some of them whole for additional texture.)

9 Comments

Filed under Biscotti, Giada de Laurentiis, Giada's Kitchen